


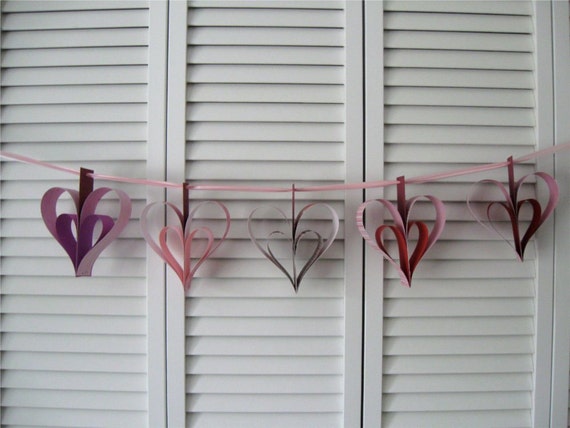
As the seasons start to change, many people find themselves wanting to brighten up their house with some colorful decor. A fun and easy project, these paper heart garlands can be made for any season, and it's a great project to do with kids. Each garland has five
hearts, but you can make more or less depending on the space
you have to fill.

For this project you will need:
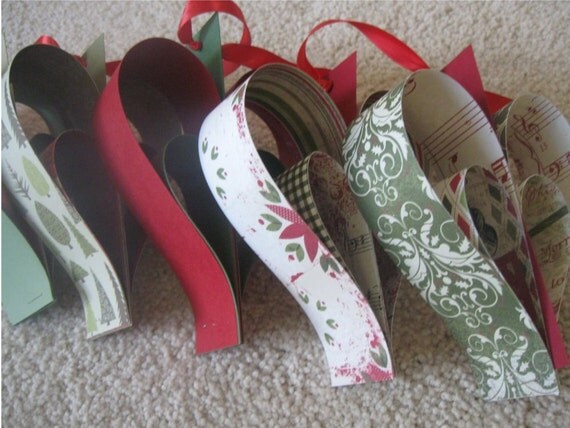
- Two 1.5 x 12-inch strips, two 1.5 x 8-inch strips, and one 1.5 x 6-inch strip of coordinating quality cardstock or double-sided scrapbook paper*, per heart (*Double-sided scrapbook paper works best, since both sides of the paper show. If you use single sided paper, you will need to glue two strips of paper together so each side has a pattern showing (if you use a patterned paper).)
- Ribbon at least 1/2-inch wide and 48 inches long for a 5-heart garland
- Hole punch, preferably 1/8 inch
- Stapler
- Ruler or measuring tape
To construct the hearts:
Starting with the shortest strip, take the two long strips and sandwich the short strip between them with the pattern you want showing facing in and upside-down. If this sounds confusing, bend the top of the long strip down to the bottom of the strip and see what side is showing out. The pattern you want should be showing and when bent should be right side up. If it is not, turn the strip so it will look the way you would like. Do the same with the medium strips, one on either side, so that in your hand you have a stack that goes: medium, long, short, long, medium.

Bend one of the medium strips down so the top of it aligns with the bottom. Do the same with the long strip next to it. That should construct one side of the heart.

Holding those, do the same on the other side, bending both strips so the tops meet the bottom.

Make sure all of the edges are lined up flush at the bottom and staple about 1/4- inch from the bottom.

Punch a hole at the top of the short strip about 1/4-inch from the top.

Set the heart aside and repeat this process for any other hearts you're making.
To assemble the garland:
Decide in what order you want your hearts to hang on the ribbon. Measure about 6-8 inches from the end of the ribbon. Tie a knot in the ribbon at that mark. This knot will hold your first heart in place. Rolling up the ribbon to fit it through the hole in the heart, slide one heart onto the ribbon and push it all the way to the knot.

Tie another knot on the other side of the paper strip as close as you can to the paper strip to secure the heart in place. This will keep it from sliding around. Measure six inches from the second knot you made in the ribbon. Tie a third knot at that point. This knot will hold your second heart in place. Like the first, slide the heart onto the ribbon and tie a fourth knot to secure the heart in place. Repeat these steps for each heart, measuring six inches between each heart.
Trim the ends of the ribbon so they are equal lengths from the end knots. This will ensure that the garland hangs more evenly.

There you have it! This is a fun family project that can be completed in a short amount of time. Have fun playing with different color schemes in different seasons!
No comments:
Post a Comment
Note: Only a member of this blog may post a comment.