Showing posts with label recipe. Show all posts

Tuesday, July 12, 2016

Berry Season: Blueberry Muffins and Berry Picking

Here in Connecticut, we are in the middle of berry picking season.  This is a fun activity to do with your kids, or it can just be a nice outing for those who want to take home some super-fresh fruit.  One of my favorite things to make with super fresh berries are blueberry muffins, so I thought I'd share a quick and simple recipe for the best blueberry muffins ever.  Yes, ever.


Gather:

1 3/4 cup flour
1/2 cup sugar
2 Tablespoons baking powder
1/4 teaspoon salt

3/4 cup milk
1/4 cup oil
1 egg

1 cup fresh blueberries

Do:

Combine all the dry ingredients in a large bowl.  Mix well for even distribution.  Make a well in the center of the dry ingredients (aka make a bowl-shaped pit in the flour but don't get all the way down to the bottom of the bowl).  In a small bowl, combine the wet ingredients.  Pour the wet ingredients into the flour well and mix until just combined.  Add the blueberries to the batter and fold in carefully as to not break the berries.

In a standard sized 12-muffin tin, fill each well 2/3 of the way with batter.  Bake for 18-20 minutes at 400 degrees until the edges start to brown lightly.  Cool for a few minutes and then move the muffins to a wire cooking rack.

(Or, do what we do and take them out of the pan piping hot and eat them.  Either way.  (Just don't get burned!))


On a berry hunt and need to know where can you find berry farms in Connecticut?  Our members and friends have some great suggestions.  Check in with each farm before you go to see what they are currently picking so you don't waste a trip:
Where are some of your favorite local berry farms?  What do you do with the fresh fruit?  Share in the comments below!

Wednesday, June 29, 2016

Summer Cucumber Salad


Summer calls for cold drinks, cook outs and crisp salads. This cucumber dish has simple ingredients and whips up in minutes.

Want this cutting board? You can find it here.


What you need:
3 english cucumbers (or 4 peeled garden cucumbers)
Handful of cherry tomatoes
4 strips of bacon (plus extra for snacking - I'm not here to judge)
1/4 cup mayo
Dash of onion powder
Salt & pepper to taste

1. Spiralize (or dice!) your cucumbers. If using garden cucumbers, place in colander and lightly salt to drain. 10 minutes should do the trick.
2. Cook up that bacon nice and crispy, then crumble.
3. Halve the cherry tomatoes.
4. Place your cucumbers in a bowl and stir in the mayo and seasoning.
5. Fold in your tomatoes and bacon.
5. ENJOY! Best served while bacon is still crispy.


This is a flexible salad - you can pop in some fun additions. Try grilled chicken, avocado, corn or olives. Let us know what you add!


Written by Alonda Baird-Juhasz, owner of Designer Dwellings, who believes in adding color to life. An avid DIYer, sparkle-loving, all things fabulous addict, her shop features bright and fun home decor accessories and gifts. When not in the shop you can find her interior decorating or visual styling events and photo shoots.

Thursday, June 23, 2016

Eat Local: Sauteed Summer Greens


It's finally summer here in Connecticut and for many of us that means the start of a local CSA farm share.  CSA stands for Community Supported Agriculture, meaning that the public can purchase a share of a farm's harvest in exchange for monetary support that allows the farm to grow.  CSA members get to pick up what's ripe for the picking each week, meaning they will be eating the freshest seasonally available food.


This week my CSA share from Sub Edge Farm in Farmington/Avon was filled with greens of all kinds - Tokyo Benaka lettuce, escarole, rainbow chard, kale, collards, and broccolini, along with some sugar snap peas and garlic.  I did not grow up eating greens outside of a few varieties of lettuce.  Until I met my Texas-born husband I don't know if I had even heard the term "greens", let alone laid eyes on these large-leafed plants.  In the almost-16 years I've known him, I've learned how to cook them properly through some definite trial and error.  My favorite is an easy recipe requiring just a few ingredients, and I used a mix of collards and rainbow chard, plus fresh garlic and garlic scapes (the green stem portion of the garlic plant) that were in my share this week.


Sauteed Summer Greens

10 leaves of collards and chard, ribs removed and sliced into ribbons
2 T olive oil
1 shallot, diced
2 cloves garlic, diced
3 garlic scapes, diced (if you don't have these, use another clove of garlic instead)
salt and pepper to taste

Bring a pot of water to a boil.  Add your raw greens to the pot and let them cook for about 5 minutes to soften them.  Transfer to a colander and allow the excess liquid to run off.  In the meantime, heat the olive oil in a skillet over medium heat.  Add the shallots and saute for 2 minutes, then add the garlic and scapes, stirring them frequently to prevent them from burning.  Cook for about 5 minutes or until the mixure is soft and fragrant.  Add drained greens to the skillet and toss with the shallot mixture, adding salt and pepper to taste.  Cook for about 15 minutes, turning and mixing occasionally, allowing the greens to soften more and brown slightly.  The greens are done when they are the consistency of cooked spinach - I always take a bite to taste test for done-ness.


What started as a bunch of thick, tough and somewhat bitter raw leaves will be wittled down to an enjoyable, mellow, completely flavorful side dish.  Serve them with grilled chicken or steak for a nice round meal.  If you are not part of a CSA this year, most local farm shops will have greens available right now, as well as at the weekly farmers markets held around the state.


Written by Kristen Skelton of Milo and Molly.  Kristen runs her business while staying at home with her two small children. Fueled by an endless supply of tea, she sews late into the night when the house is quiet, most often accompanied by her faithful poodle, Casey.

Thursday, June 2, 2016

Homemade Strawberry Lemonade


Hot weather means cool summer drinks!  As local strawberries appear, make a batch of homemade strawberry lemonade for a sweet treat.

You'll need:

3 lemons
1 quart fresh strawberries
1 cup of sugar, divided
water

Remove the strawberry stems and quarter the berries in a small bowl.  Add 1/4 cup of the sugar and allow the berries to macerate for at least an hour to sweeten them and draw out the juice.  Puree the softened berries in a blender or food processor (a mini chopper is also handy) and pour the puree into a 2-quart pitcher.  Juice the lemons, keeping any seeds out, and add the juice plus the remaining 3/4 cup of sugar to the pitcher.  Fill with water halfway, covering it tightly and shaking the pitcher vigorously to help dissolve the sugar.  Fill to the top with water and shake again.  Refrigerate, or serve over ice, and enjoy!


Wednesday, May 4, 2016

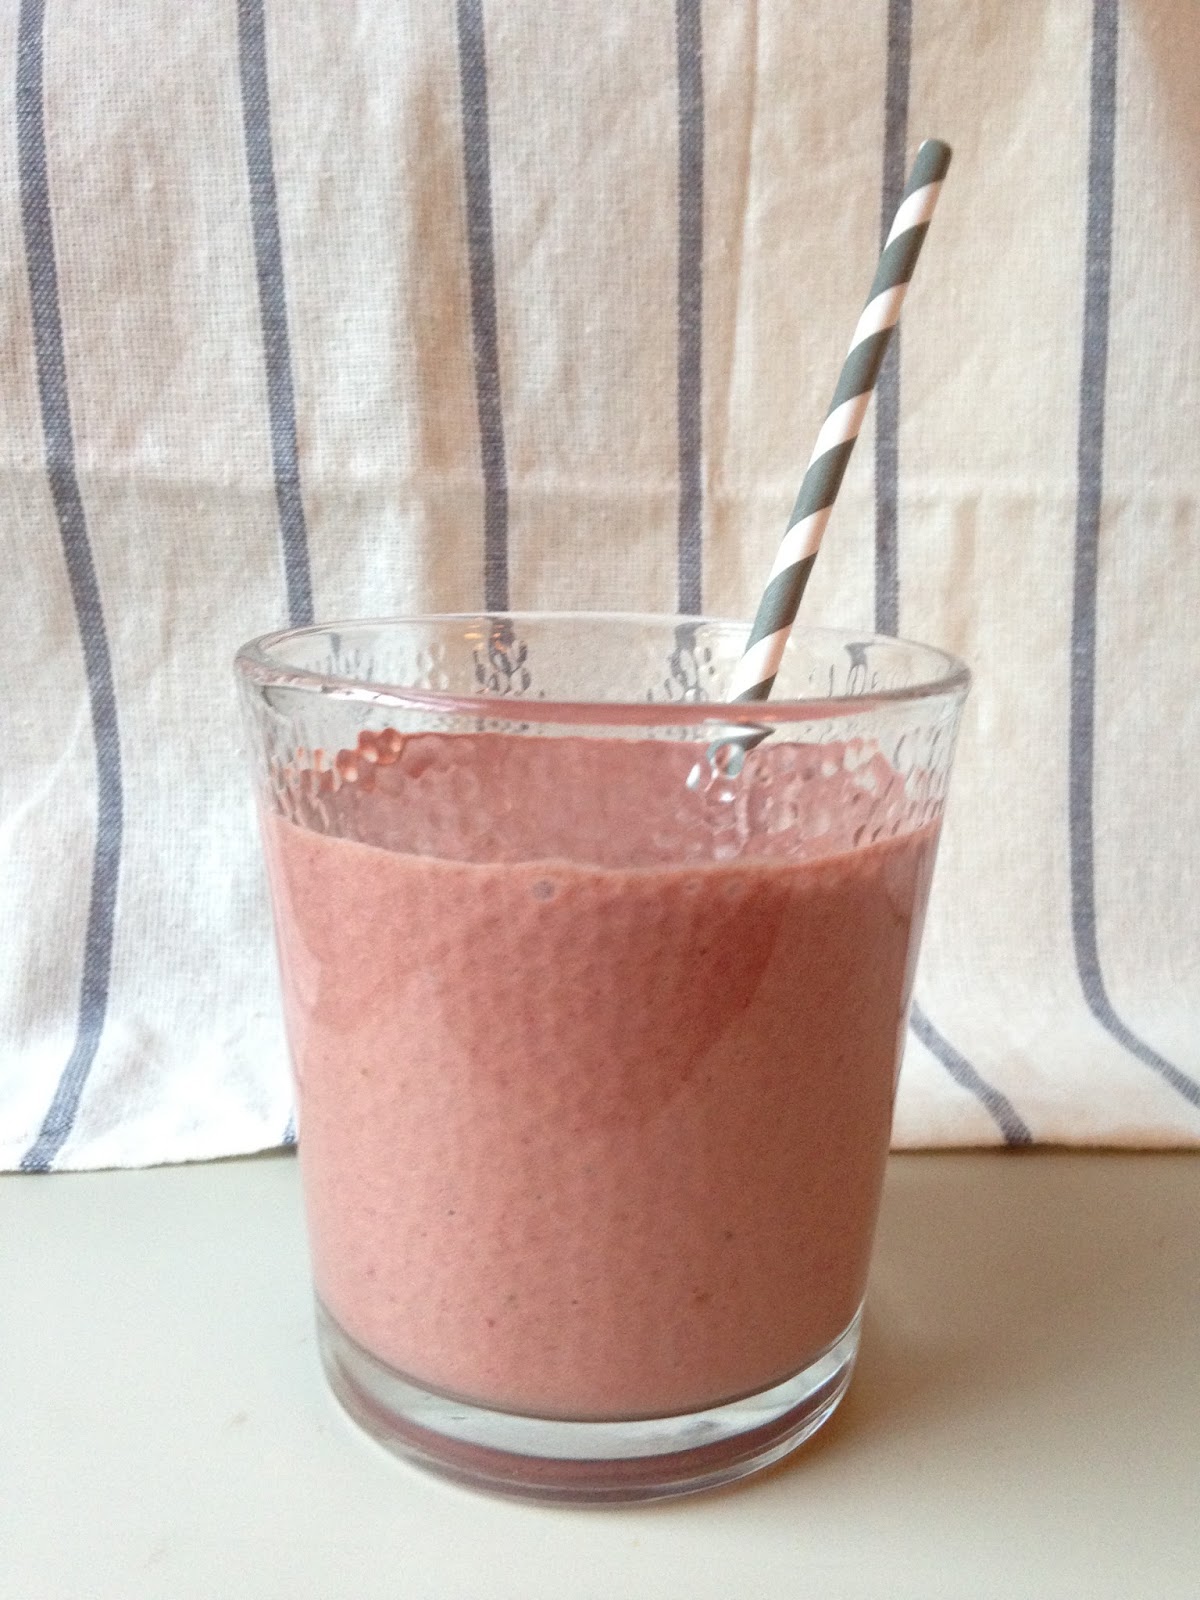
Banana Split Smoothie


Smoothies are a great way for anyone who doesn't like fruits and vegetables to add a few to his/her daily diet. This recipe is simple and it's one that I came up with for my 10 year old to please, please, please, eat a piece of fruit. The smoothie is a spin on a banana split and he asks for it every morning now.


Banana Split Smoothie


5 large or 7 small frozen whole strawberries
1/2 large banana
1 T cocoa, unsweetened
Sweetener to taste (I use 2 powdered stevia packets, but any preferred sweetener will work)
3/4 (thick smoothie) to 1 cup (thinner smoothie) of milk
Splash of vanilla extract (optional)

Put all the ingredients in your blender and blend to a smooth consistency.
Serves one 10 year old or other individual.

Bottoms up!


Cyn Thomas is the illustrator, designer and pattern maker of RiverDog Prints. Her paper goods and gifts are guided by earth, animals, function, food and cocktails. You can also find Cyn canning in her kitchen, walking her dog, being outnumbered by her boys and husband or reading herself to sleep.
Website | Instagram | Twitter | Facebook | woof@riverdogprints.com

Thursday, February 11, 2016

Vegan Cranberry-Cashew Chocolate Bark


Just in time for Valentines's Day, this homemade chocolate recipe can be whipped up quickly, and ingredients can be changed to suit your taste: just add your favorite ingredients in place of the cranberries and cashews.  This chocolate can also be made without any fruit or nuts if you prefer a simple chocolate bar!  Vegan and gluten-free, this recipe is sure to be a hit with everyone!

You will need:

½ cup coconut oil
½ cup unsweetened cocoa powder
3 T maple syrup
1 tsp vanilla
1/3 cup dried cranberries
1/3 cup raw cashews
Pinch of salt

Line an 8 inch pie plate or cake pan with wax or parchment paper.  Sprinkle cashews and cranberries over the paper.  In a small saucepan, melt the coconut oil over medium-low heat. Once the oil is completely melted, add the salt, vanilla and cocoa powder and continue stirring until melted and no lumps appear.  Remove the saucepan from heat and place it in the refrigerator for 30 minutes.  Remove from the refrigerator and add in the maple syrup.  Stir thoroughly to ensure the ingredients are combined.  If the chocolate seizes, place the saucepan over low heat and stir until the mixture re-melts.  Pour the mixture over the cashews and cranberries, and put it in the refrigerator for at least one hour.  Once solid, remove the chocolate from the parchment paper and break into chunks.

Note: Because coconut oil melts at 76 degrees F, it is recommended that the chocolate remain stored in the refrigerator.


With a love of creating and decades of ultra-sensitive skin, Jennifer Knapp became curious how soap was made after receiving a handmade bar. Several classes and months of research later, Jennifer launched Nutmeg Naturals LLC, with a line of soaps catering to all skin types. Jennifer’s products include cold-process handmade soaps, laundry soaps and wool dryer balls. In 2014, Jennifer launched The Felt Haus, a place for her other felted projects. She is a native Nutmegger and lives in Haddam with her husband and daughter.

Tuesday, February 2, 2016

Valentine's Fun: DIY Conversation Hearts


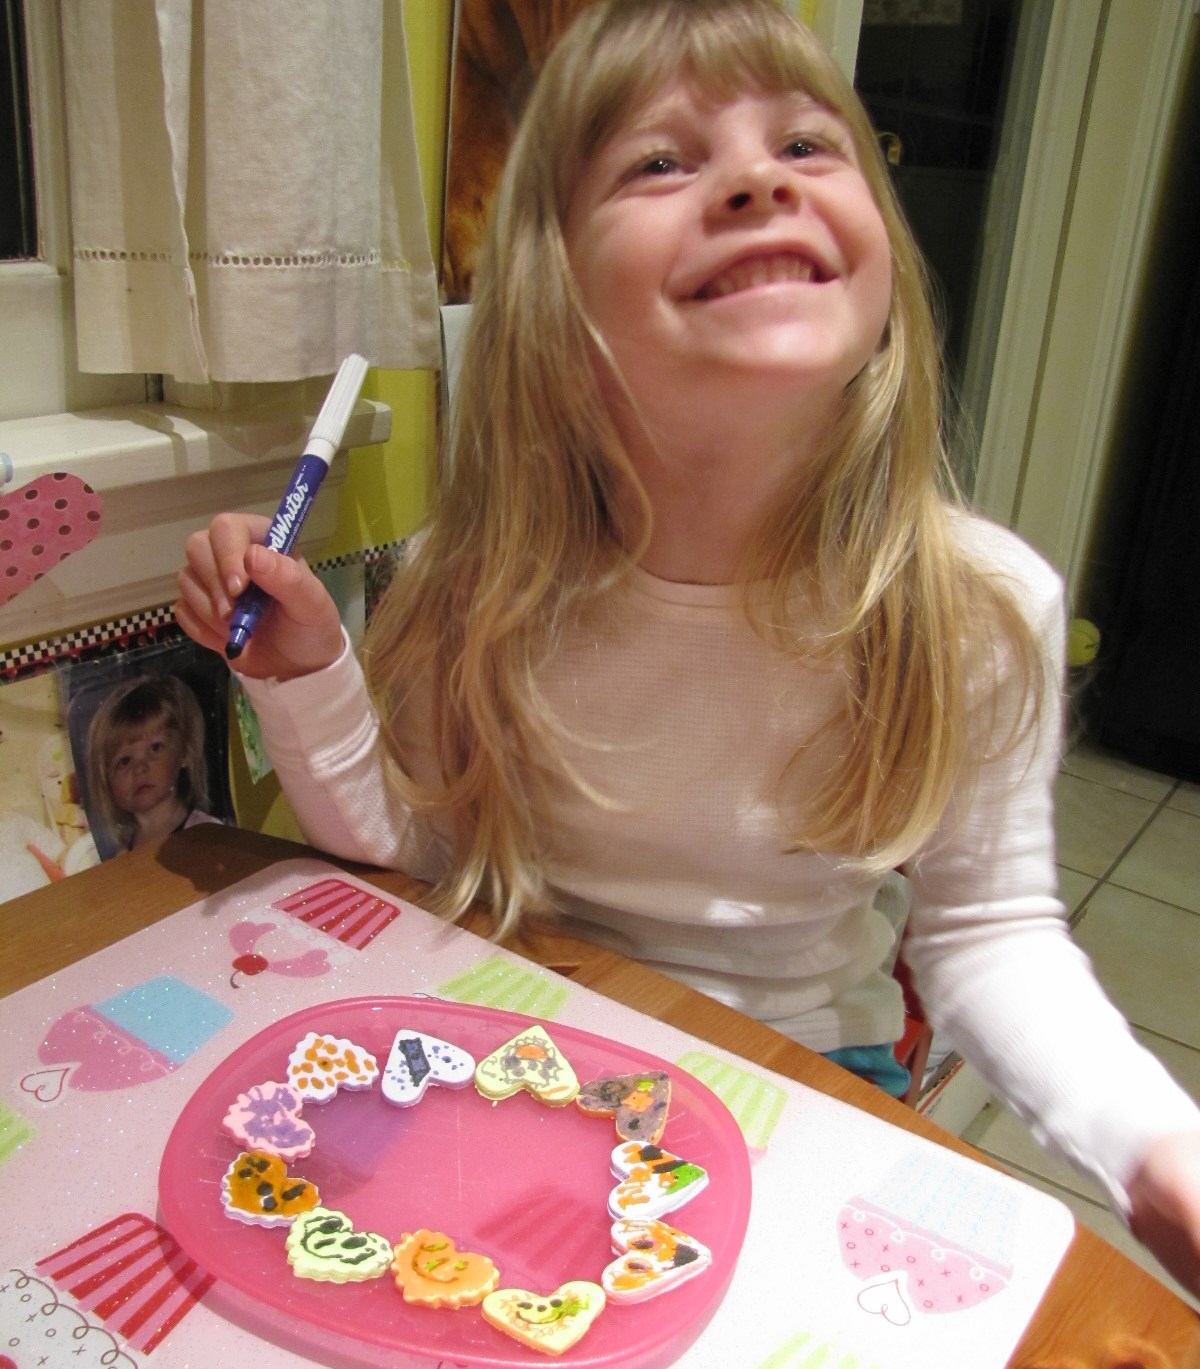
Valentine's Day is on its way, and for those of us with kids, we're always looking for a fun holiday project we can do each other and to make as gifts.  We made these a few years ago and we have fond memories of how fun they were to make, we may try again soon!

We’ll need:
  • 1 packet (1/4 oz, or 2 tsp) unflavored gelatin
  • 1/2 cup water
  • 2 tsp light corn syrup
  • 2 lbs powdered sugar, plus additional for dusting
  • Assorted flavoring extracts of your choice
  • Assorted food colors of your choice
  • Heart-shaped cutters
  • Food coloring markers

Put the corn syrup, gelatin, and water in a small microwave-safe bowl.  Stir until the gelatin is well-distributed.  Microwave the mixture for 30 seconds, so the gelatin dissolves, and stir well.  Pour the gelatin mixture into mixer bowl (mixer prepared with paddle attachment).  Add 1 cup of powdered sugar and turn the mixer to low, mixing until the sugar is incorporated.

Once the sugar is mixed in, add another cup of sugar, again mixing on low until it incorporates. Continue to add the remaining powdered sugar, one cup at a time, pausing in between additions to allow the sugar to mix in, until the full two pounds of powdered sugar is added. Periodically, stop the mixer and scrape down the bottom and sides of the bowl. The candy will progress from a thin, watery liquid to a very stiff dough.

Once all of the sugar is incorporated, dust a work surface (counter or large cutting board) with powdered sugar and scrape the candy out onto the work surface.  The candy will be very sticky and stiff.  Generously dust the top of the ball of candy with powdered sugar, and begin to knead the candy like bread dough: fold the ball of dough over onto itself, then use the heel of your hand to push it down.  Give the candy a quarter-turn, and repeat the process, dusting it with more powdered sugar as often as necessary to prevent it from sticking to the board or your hands.  Knead until the candy is satiny and not sticky.  TADA!


Decide how many colors/flavors of conversation hearts you want to make, and divide the candy dough into that many portions.  To flavor and color the candy, take one of the balls and flatten it into a palm-sized disc.  Add a few drops of food coloring and flavoring extract to the center of the disc, and fold it over on itself.  Your hands will look and smell lovely.  Probably for days.


clockwise from top: pink = vanilla, purple = root beer, green = spearmint, orange = tangerine 

Dust your work surface and a rolling pin with powdered sugar and roll out one of the candy balls to your desired thickness.  Ours were about 1/4″.  Use heart-shaped cutters to cut hearts out of the rolled candy, and transfer the hearts to a baking sheet.  Once you have cut out your hearts, you can re-roll the scraps to get more shapes out of the dough.  We were able to get 2 runs out of each color with some extra.   Repeat with remaining candy balls.  Allow your hearts to air-dry for at least 24 hours before you write on them.  This step is VERY important, because any extra moisture in the hearts will cause the ink to run later if you do not let them dry properly.


Once completely dry, decorate as you like with edible/food coloring markers. This is a great part of the project for just about any age.


Package them up and they are a sweet gift for friends, neighbors, family and teachers!


Vanessa Felie, aka "Queenvanna" juggles a husband and two blond pixies while running her burgeoning paper arts and crafts business, QueenvannaCreations. Her job and family inspire her to create crafty projects for holidays, vacations, as well as times when there's just not much going on. Perpetual calendars and other home items, scrapbooking album kits and personalized gifts of all kinds - She looks to add a little flair to everything she makes, to put some extra fun in to daily life, as well as special occassions.
Website | Instagram | Twitter | Facebook | queenvanna@cox.net


Tuesday, January 19, 2016

Making Nocino


Last July, my friend Kate of Snowflake Kitchen, put a call out to us locals about her abundance of green walnuts from the tree on her property. She had plans to make Nocino and thought we may want to give it a try. Yes, please! I was in her neighborhood when she wasn’t home, so I felt like a bit of thief as I foraged a bag of the green nuts, but homemade booze is worth the possible embarrassment of her neighbors calling the police.

A photo posted by Kate (@snowflakekitchen) on


I used David Lebovitz’s recipe, minus the cloves, and shook my jars once a day for about three months. It looks like witches’ brew at first, very green and possible toxic, but then changes to a rich brown, deep green.


I strained the liquid from the jars and it has the consistency of a light syrup and smells nutty and warm. I sampled a small glass and it’s definitely potent. I like Mr. Lebovitz’s idea of a topping for ice cream… that will definitely be in my future.


There is something about creating an enjoyable drink or food from items you gather from your yard, a friend’s yard, local farmers, or the woods (if you’re daring and safe) that feels inevitable and right. I’ll have a part two of the walnut saga as I attempt to make black walnut bitters from the same nuts that have completely ripened. My goal is to make something like this. It’s good to have goals…


Cyn Thomas is the illustrator, designer and pattern maker of RiverDog Prints. Her paper goods and gifts are guided by earth, animals, function, food and cocktails. You can also find Cyn canning in her kitchen, walking her dog, being outnumbered by her boys and husband or reading herself to sleep.
Website | Instagram | Twitter | Facebook | woof@riverdogprints.com

Thursday, January 7, 2016

Winter Food: Slow Cooker Oatmeal


Winter is finally here!  As the cold sets it, we find ourselves looking for warm fare for our bellies.  Overnight oatmeal is perfect- it's warm and ready to eat when you wake up to a cold house.

I love oatmeal with all my heart.  Instant Quaker plain packs with honey and milk has been a staple in my life since I was little, and both my kids love the combination.  I know that the packets are not the best choice as far as oatmeal goes, though, and as I've been trying to weed the pre-packaged food from my cabinets, I've taken to making what I call Midnight Oatmeal, since you cook it in the slow cooker and it needs to be turned on roughly around midnight, depending on what time you get up in the morning.  Midnight Oatmeal is steel cut oats (or Irish oats), which are slightly better for you than rolled oats, and vastly better for you than flavored oatmeal packets.  They normally take awhile to cook on the stove, so it's not a meal to prepare if you're hungry right when you wake up, which is where the slow cooker comes in.  You set the oats to cook late at night, and they're ready for you in the morning, and it makes the kitchen smell amazing.

In your slow cooker, spray your bowl really, really, really well with cooking spray (I use coconut oil spray) and combine the following:

1 1/2 cups of steel cut oats (I like Bob's Red Mill organic)
2 1/4 cups water
2 1/4 cups milk (I use 1 cup 2% milk and then 1 1/4 cups unsweetened almond coconut milk)
1/2 cup brown sugar
2 tablespoons ground flaxseed
1 1/2 teaspoons cinnamon
a pinch or two of salt
1 tablespoon butter, cut in pieces

Cook on low for 7 hours, then stir well.  If you cook it longer, crunchy bits will form around the edges, which are delicious but make for a tough cleanup.  The oatmeal is creamy and delicious as is, though I love to top mine with a little bit of maple syrup, and you can also top with nuts, fruit, seeds, or coconut to suit your taste.  Another alternative- chop an apple into small pieces and throw it in with the mixture to make it applesaucy, or make a batch of easy slow cooker applesauce and serve together.


This hearty meal is guaranteed to fill you up and warm you up on these super-cold mornings, and this size batch gives me enough to eat all week.  Do you love oatmeal?  Have you tried it in the slow cooker, or are you a packet person?


Kristen Skelton of Milo and Molly is a self-taught sewist, Kristen who runs her business while staying at home with her two small children.  Fueled by an endless supply of tea, she sews late into the night when the house is quiet, most often accompanied by her faithful poodle, Casey.  Stop by and see her collection of bold modern accessories and home goods.
Website | Instagram | Twitter | Facebook | miloandmollyshop@gmail.com 

Wednesday, December 2, 2015

Apple Salsa Recipe

source

Hurry!  Before all the local apples are gone, make this great recipe from Denise of The BURNT Shop.

My APPLE SALSA

6 cups cored apples (leave the skin)
1 large red pepper cut into qtrs
1 medium yellow onion
1 med jalapeño (add seeds for spicy or leave them out for mild)
Zest and juice of 2 lg limes
1/2 tsp ground cumin
1/2 tsp ground cinnamon
1/2 tsp salt
1/2 tsp ground black pepper

1 Bunch finely chopped scallions (keep separate)

Process apples and lime in a food processor until well combined but still slightly chunky...set aside.
Process yellow onion and peppers with seasonings until well combined.

Mix the 2 batches together in a large bowl and add finely sliced scallions.
Keeping the batches separate just helps to preserve the colors so the salsa looks prettier...it's not critical.

This will keep well for over a week.

It does not can well because it loses it's crisp yumminess but the flavor will still be great.

This is a great salsa for all those fall gatherings because you can make a huge batch and everyone will be asking you for the recipe...try it paired with grilled chicken and roasted sweet potatoes.

*****

Denise O'Reilly, owner of The BURNT Shop in Glastonbury, Ct. is creating usable art in the form of hand etched glass culinary bottles and woodburned housewares. She believes wholeheartedly that everything we use on a daily basis should be just as beautiful as it is functional. She sources the highest quality glass and wood pieces and adds her unique freehand designs using centuries old techniques. These pieces are transformed into heirloom quality works of art which she hopes will be passed down in families to future generations. She has a passion for all things green, reusing and repurposing 100% of incoming packaging. She encourages customers to bring her their existing pieces for her added touch...thus reducing that urge to purchase more "stuff" but rather making your own treasured items that much more special.
Website | Facebook | Instagram


Wednesday, October 21, 2015

Roasted Pumpkin Seeds


Being right in the middle of the fall season means that pumpkins are everywhere, and with Halloween coming, many people take to decorating them and putting them out for display.  If you are a pumpkin carver, then you know one of the first steps is getting out the seeds.  Don't throw them away because they can make for a crunchy treat in just a few simple steps.

As you're gutting the pumpkin, throw all the seeds into a large mixing bowl.  Don't worry about removing the guts from the seeds, just focus on the job at hand.  Once it's done, fill the bowl with the seeds with warm water and swirl them around with your hand.  This will help most of the strings and fruit come away from the seeds.  Use your fingers or a large flat strainer to skim the seeds out of the water- avoiding any of the leftover innards- and place the seeds in a colander.  Rinse them again, removing anything that is not a seed.  Pat the seeds with paper towel to remove some of the water, but watch out because they will be slippery.


Line a sheet pan with foil and spread the seeds out.  Melt 2-3 tablespoons of butter and pour over the seeds, stirring them on the pan to coat them all.  Spread the seeds in a single layer and sprinkle with sea salt until they are all lightly coated.  Place the seeds in a 375 degree oven and roast for 30-40 minutes, stirring every 10 minutes, until the seeds are a nice golden brown.


Variations:

Instead of sea salt, try one of the following:

  • garlic salt
  • powered ranch dressing mix
  • cinnamon and sugar
  • Old Bay seasoning

  Enjoy!


Kristen Skelton of Milo and Molly is a self-taught sewist, Kristen who runs her business while staying at home with her two small children.  Fueled by an endless supply of tea, she sews late into the night when the house is quiet, most often accompanied by her faithful poodle, Casey.  Stop by and see her collection of bold modern accessories and home goods.
Website | Instagram | Twitter | Facebook | miloandmollyshop@gmail.com 


Friday, October 9, 2015

Midnight Oatmeal


As the temperatures start to shift downward, I start thinking about cold weather foods.  I love oatmeal with all my heart.  Instant Quaker plain packs with honey and milk has been a staple in my life since I was little, and both my kids love the combination.  I know that the packets are not the best choice as far as oatmeal goes, though, and as I've been trying to weed the pre-packaged food from my cabinets, I've taken to making what I call Midnight Oatmeal, since you cook it in the slow cooker and it needs to be turned on roughly around midnight, depending on what time you get up in the morning.  Midnight Oatmeal is steel cut oats (or Irish oats), which are slightly better for you than rolled oats, and vastly better for you than flavored oatmeal packets.  They normally take awhile to cook on the stove, so it's not a meal to prepare if you're hungry right when you wake up, which is where the slow cooker comes in.  You set the oats to cook late at night, and they're ready for you in the morning, and it makes the kitchen smell amazing.

In your slow cooker, spray your bowl really, really, really well with cooking spray (I use coconut oil spray) and combine the following:

1 1/2 cups of steel cut oats (I like Bob's Red Mill organic)
2 1/4 cups water
2 1/4 cups milk (I use 1 cup 2% milk and then 1 1/4 cups unsweetened almond coconut milk)
1/2 cup brown sugar
2 tablespoons ground flaxseed
1 1/2 teaspoons cinnamon
1 tablespoon butter, cut in pieces

Cook on low for 7 hours, then stir well.  If you cook it longer, crunchy bits will form around the edges, which are delicious but make for a tough cleanup.  The oatmeal is creamy and delicious as is, thoughI love to top mine with a little bit of maple syrup, and you can also top with nuts, fruit, seeds, or coconut to suit your taste.  Another alternative- chop an apple into small pieces and throw it in with the mixture to make it applesaucy, or make a batch of easy slow cooker applesauce and serve together.


This hearty meal is guaranteed to fill you up and warm you up on these super-cold mornings, and this size batch gives me enough to eat all week.  Do you love oatmeal?  Have you tried it in the slow cooker, or are you a packet person?


Kristen Skelton of Milo and Molly is a self-taught sewist, Kristen who runs her business while staying at home with her two small children.  Fueled by an endless supply of tea, she sews late into the night when the house is quiet, most often accompanied by her faithful poodle, Casey.  Stop by and see her collection of bold modern accessories and home goods.
Website | Instagram | Twitter | Facebook | miloandmollyshop@gmail.com 


Wednesday, September 23, 2015

The Healthy Flavors of Fall

Photo is © Olga Vasilkova

Summer has not officially ended yet, but we are already in full swing of delicious Fall flavors. Pumpkin Spice this and Apple Pie that. It’s everywhere! Peeking in the family garden, I already see small to medium pumpkins getting ready for the Fall harvest. So instead of indulging in syrups and other artificial flavors, why not make some delectable fall goodies with ACTUAL Pumpkin and Apple! Here are two clean eating, whole food recipes for those who love the flavors of Autumn.


Baked Cinnamon Apple Chips

3 apples (we like to use a mix of Granny Smith and Macintosh, but any kind will work!)

ground cinnamon

ground raw sugar (OR powdered Stevia, be sure to use less Stevia as it is stronger and sweeter!)

2 baking sheets lined with butcher paper or silicone baking mats


Preheat oven to 200 degrees.

Cut the apples into thin round slices. Place slices on the baking sheets in a single layer and sprinkle with cinnamon and sugar.

Bake for 1 hour. Flips all the slices and continue to bake for another hour - hour and a half. If you’d like your chips on the crunchy side, leave the slices in the oven for another hour after you’ve turned it off and are letting the oven cool down. The result is a delectable treat sure to go fast!

If storing, be sure to seal these in an airtight container to preserve crispness.


Natural Pumpkin Spice Latte

1 shot of espresso or 4 oz. of very strong coffee

3/4 cup of milk of choice

3 TB organic pumpkin puree

1 TB of real maple syrup

5 drops of stevia

1/8 tsp. of pumpkin pie spice

1/8 tsp. of vanilla extract

Pinch of coconut sugar for topping 


This can be served hot or cold over ice. Blend with ice for a natural frappe.


*originally published by Jillian Lyons in The Life Center of Connecticut blog.


andMorgan is a father-daughter team that screen prints flour sack tea towels, tote bags, wine bags and t-shirts. Jeff has owned a screen printing and embroidery business in Bristol, CT for almost 25 years and taught himself everything he knows about screen printing. Jillian has always enjoyed drawing, cooking and collecting way too many tea towels! We combined our passion for all of these things together in order to create modern and fun products for any kitchen or home.
Instagram


Tuesday, September 15, 2015

Lemon Basil Mayonnaise.


There is nothing quite like the bright, fragrant smell of basil.  Combine it with the freshness of lemon and you've got yourself an amazing condiment.


Lemon Basil Mayonnaise

2 cups mayonnaise
2 cups (packed) fresh basil leaves
Zest and juice of 2 lemons
1 tsp kosher salt
1-2 tsp. dried minced garlic
1/2-1tsp. freshly ground black pepper

Combine all the ingredients in a food processor and twist that goodness up for about 40 seconds.  Store in a covered jar in the refrigerator for up to 2 weeks.


Dip the following with reckless abandon: Fresh tomatoes, cucumbers, zucchini, blanched broccoli and cauliflower.  Slather on all the grilled things!  Try: asparagus, zucchini, red peppers, sweet corn, sweet potatoes, chicken, swordfish, bluefish, clams, salmon, pork tenderloin.   Smear it on a nice fresh baguette and grill that baby up! Add a dollop to your favorite potato or pasta salad, use as a sandwich spread, or add a glob into homemade marinara.  This stuff is so bright, fresh and rich it makes everything better!

Enjoy!


Denise O'Reilly, owner of The BURNT Shop in Glastonbury, Ct. is creating usable art in the form of hand etched glass culinary bottles and woodburned housewares. She believes wholeheartedly that everything we use on a daily basis should be just as beautiful as it is functional. She sources the highest quality glass and wood pieces and adds her unique freehand designs using centuries old techniques. These pieces are transformed into heirloom quality works of art which she hopes will be passed down in families to future generations. She has a passion for all things green, reusing and repurposing 100% of incoming packaging. She encourages customers to bring her their existing pieces for her added touch...thus reducing that urge to purchase more "stuff" but rather making your own treasured items that much more special.