Showing posts with label photography. Show all posts

Thursday, March 3, 2016

Local Love: Garnet Leigh Designs

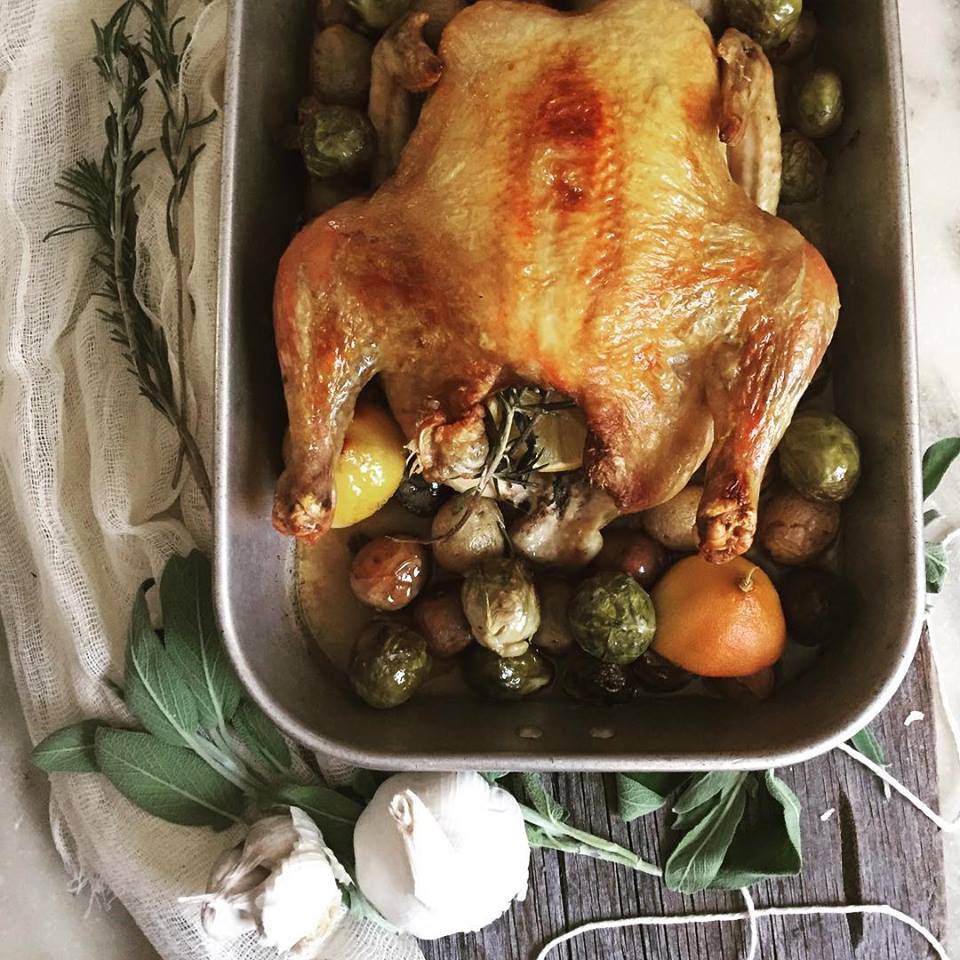
Photo: Nicole Alekson Photography

Meet Melinda of Garnet Leigh Designs, who does on-trend prop styling and merchandising for retail, food and artisan wares.


"My business began during my twenties when I did freelance prop styling for independent retail shops, after I left work as a full time display director. After taking time off for school and having a family, I've been back at it for about four years. Working in retail for smaller, specialty shops gave me an appreciation for how difficult it is for stores like that to stay competitive with big box stores and now the internet. The owner wears many hats and in some cases doesn't have the visual talent to display merchandise in the best way possible. My passion has become keeping independent retailers and artisans as profitable as they can be. I even organize an annual Small Business Saturday event for Glastonbury, Connecticut, which supports my town’s small business, artisans and restaurants.


My service gives retailers a way to keep their shop fresh, current, inviting and on-trend. It also allows for merchandise to be featured in a way that customers see it and are inspired to make a purchase, even if it has been in the store for quite some time.

Photo: Nicole Alekson Photography
Some of the challenges for my business are staying in touch with people and also, selling the idea that they need this service. Many do not realize how crucial merchandising is and how often the shop interior needs to change. It should be a constantly evolving environment in order to keep folks coming back through the door. It's not enough to just change the merchandise, the whole set up may need to change. Because I am very active on social media, I see many businesses that promote themselves well, and many not so well. Each and every photo that represents a business and/or product should be eye-catching and appealing. I cannot stress enough what a turnoff a bad picture is. To me, it shows a lack of attention to detail.

Photo: Nicole Alekson Photography
I also consult with artisans with regards to how they package and merchandise their products and make recommendations for, or do a hands-on setup, for display booths at vendor fairs. I have also done some food styling which is a lot of fun. It's one way that I get to let loose and be purely creative without having to blend my natural creativity with the marketing piece."


860-989-5831


Connect with her on Facebook or Instagram!


*******


We love local businesses! 


Are you an independently-run Connecticut brick and mortar?
Get a feature by clicking here.

Tuesday, December 29, 2015

Best of NC : Product Photography: Tips for Vintage Sellers

This week, we're running the best posts from this past year.  Enjoy!


As with any item listed online, pictures can either make or break a sale. The images you post need to evoke the feeling for the seller that the item is right in front of them, within reach. Something they feel they can reach out and touch, something that they can picture sitting in their own home, wearing on their wrist, or holding it in their hands. For vintage sellers, the task can sometimes be much harder. Every item we sell rouses a unique sense of the past, where the item originated, and the shape it is in today. When selling vintage, it is important to show the item in it's best light, but to also make sure the item is correctly portrayed - every nick, flaw or sign of age.

As a seller of vintage goods online on Etsy for over three years, I have struggled with these exact facts- what is the best way to show my item? How can I make prospective buyers see all the fabulous assets of my item, especially what I like to call, those items that are in vintage condition and show their age. I have come up with several tips on how to show your vintage item in the best way possible to online shoppers:

1. Background matters:
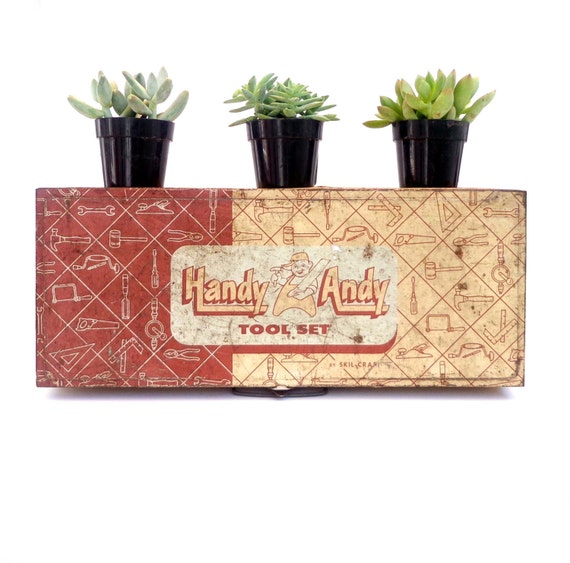
I struggled and struggled and struggled with backgrounds and never could make my photos look like they were "professional" so to speak. I envied the top selling shops and their amazing photography skills. Low and behold, with some constant admiring of my favorite shops and some online snooping, I found out how to utilize materials I had lying around my house to create my own little studio using a simple white poster board as a background. The key, I found, was the simpler the better. Avoid busy backgrounds that can draw away from your item- your item should be the main focus of the picture. While I personally prefer a white background, I am also drawn to wood backgrounds and simple textured backgrounds, like linen. Take a few shots to see what works best - try showing the item in front of a white poster board, lying on burlap, on your studio table, etc.


2. Show your item's flaws in the photograph:
Unless the vintage item is deadstock and still new in the package, it will surely have some flaws. Do not try to take a picture where the scratch is hard to see or the ding is on the other side. Many customers love the vintage items for their wear and tear appeal and seek out the rusty and dinged. I refer to these items in my own shop as having "vintage character" Make sure your photos include the good and the not so good-you never want to mislead a buyer. Show it up-close.

3. Close-Up:
Speaking of showing your items up-close, don't forget a close-up photo in your listings. A close-up allows your potential buyer to envision the item's texture.

4. Natural light is your friend:
When possible, I prefer shooting outdoors out of direct sunlight or indoors in an area with lot of natural light flowing in, but not flowing directly where you will be photographing.
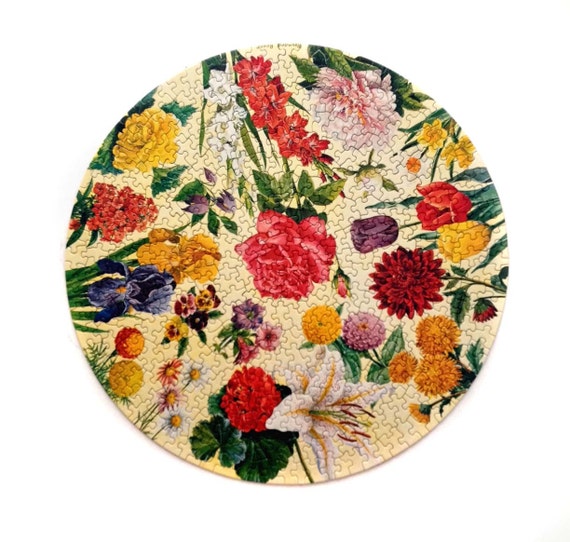
Jigsaw Puzzle- Springbok Circular Puzzle - Garden Flowers - Vintage 1960s -  Maynard Reece - Floral Puzzle - Flowers - Gifts For Her
5. Take many, many, many photos:
When photographing, I sometimes take up to 20 photos of each item with many different angles. When I load them onto my computer, I narrow them down to the five that Etsy allows per listing. Seeing all the images one the one screen allows me to pick the five that best represent my item, getting many different angles.

6. Props props props!
Showing other items with the items being listed helps customers to envision the item displayed in their home next to their things. If the item is something that would look great on a bookshelf in the living room, add some books next to it. If you're selling a basket, fill it with something! Also gives the customer a better idea of the size of the items (because we are all guilty of thinking something will be much bigger or vice versa until we actually see it in person. *When using props, always remember to use a disclaimer stating exactly what the listing is for, "ie: books used in the listing images are for display purposes only and not included in the listing. If you don't add this disclaimer, customers may be wondering why their new item doesn't come with the lovely pine cone featured next to it.
*HINT: use items from your current inventory as props, too. This way you can say "Like the book collection I have featured in the photograph? View the listing here!"

If at first you don't succeed, try try again! Trial and error is the best way to see what personally works for your shop and your items, there is no "one-size fits all" way that your listings can be photographed. Enjoy the process!


Jessica Labowski of Start Talking Vintage: Jessica is a 23-year old recent college graduate who has developed a passion for all things vintage and the rich history they carry. She enjoys treasure hunting for historic beauties at estate sales, crafting, sewing and DIY projects (especially those that upcycle vintage items and give then new, modern appeal!) Stop by to take a look at her curated vintage treasures and handmade, vintage-inspired goods.


Thursday, August 6, 2015

Local Love: Sara Zinn Photography


Meet Sara Zinn and take in her beautiful photographs.  "I opened my business, Sara Zinn Photography, a couple years ago. It started as a side business and I catered to mostly my friends and family. For many years, I had worked at a high volume portrait studio, unsure if I wanted to bite the bullet and pursue my OWN photography business.

This past January, I made the decision (with the support of my loving husband) to move on from my job at the studio and dive into my business for myself! More and more clients were finding my business (not just family and friends anymore!) which helped fuel my decision.


I am a newborn, children, and family portrait photographer! I offer a few different types of portrait sessions, but my favorite, and my specialty are styled sessions for kids! My styled sessions (I call them Whimsy sessions!) are sessions designed with the child in mind. It's built and created around their interests, personality, imagination, daydreams, favorite stories, favorite color, etc! I began offering these sessions because I realized more and more clients wanted props in their sessions. I saw other photographers offering styled sessions, which are great, but I wanted to do things a little differently, kick it up a notch! I wanted to offer my clients a truly unique, customized portrait with a theme built around their child and who they were at that age!

I offer products such as Canvas wraps (my favorite product to sell!), Custom image boxes, Albums, Framed prints, Digital files, and Gift prints. My goal is to give my clients amazing products that they can enjoy for years to come!


I knew that to run my own business I would spend more time on the "business" side of things, rather than taking portraits (which is my favorite part of the job), but I never really knew how time consuming it would really be! When you are the one and only employee, the many tasks of running a business can become daunting, especially when you first open your business (building your brand, figuring out your workflow, and promoting yourself!). What has helped me with these challenges is to talk and network with other seasoned business owners! They give the best advice because they have already encountered those challenges!


I recently began working with a designer for my styled sessions (The lovely Alonda from Designer Dwellings!) and it's been a blast brainstorming and coming up with session ideas with her! We recently styled an Alice in Wonderland session, you can check it out on the blog, http://www.sarazinnphotography.com/blog/2015/6/1/alice-in-wonderland-a-whimsy-session-connecticut-childrens-photographer

Every couple of months or so, we have mini session events, or 'mini whimsies!' These are smaller styled sessions, designed with a specific theme. The most recent session was our Superhero Themed Mini Whimsy event on July 19, 2015, at Northwest Park in Windsor!"


For more information about sessions, recent sessions, and events, 


Phone: 860.306.7210


*******


We love local businesses! 


Are you an independently-run Connecticut brick and mortar?
Get a feature by clicking here.


Know a shop that deserves a feature? Contact us at thenutmegcollective@gmail.com.


Friday, July 3, 2015

FIRE!


I am by no means a photographer, but I like to fool around with my camera. This holiday weekend we’re going to play with sparklers and see what kinds of pictures we can get…


I have found a few tips for taking sparkler pictures:

  • Plan ahead – the darker it is the better, as little ambient light as possible. 
  • Use a tripod or a level surface to lay your camera down – the person taking photos shouldn’t hold the camera, any movement at all will make photos blurry.
  • Set the camera to a long shutter setting if you have a shutter priority choice (5-10 seconds depending on what you are writing), or the fireworks setting if your camera has it.


The technique:

Hold the sparkler away from yourself, and move quickly. If you’re writing letters, draw them backwards.


Have fun practicing and experimenting!


Vanessa Felie, aka "Queenvanna" juggles a husband and two blond pixies while running her burgeoning paper arts and crafts business, QueenvannaCreations. Her job and family inspire her to create crafty projects for holidays, vacations, as well as times when there's just not much going on. Perpetual calendars and other home items, scrapbooking album kits and personalized gifts of all kinds - She looks to add a little flair to everything she makes, to put some extra fun in to daily life, as well as special occassions.
Website | Instagram | Twitter | Facebook | queenvanna@cox.net

Monday, April 13, 2015

One Thing: Stop and Shoot!


If you are a maker or artist or a vintage curator, images of your process can give your audience a peek "behind the scenes."  While you're actually making, creating or curating, try to find a natural break in your process to take a photo or two of your work in process.  Yes, it is one more thing to think about and do, but you'll be happy that you planned to fit it into your day. A glimpse into your creative and work space will inform your audience and support your brand.

You can use the images you shoot in many different places, including social media, your blog, when you're featured or guest posting on another blog, and on your About Page.  Have you ever wished that you had one or two photos of your process? Then, you should definitely stop and shoot at your next opportunity!

Process Photo above courtesy of QueenVanna Creations.


Cyn Thomas is the illustrator, designer and pattern maker of RiverDog Prints. Her paper goods and gifts are guided by earth, animals, function, food and cocktails. You can also find Cyn canning in her kitchen, walking her dog, being outnumbered by her boys and husband or reading herself to sleep.
Website | Instagram | Twitter | Facebook | woof@riverdogprints.com

Monday, March 30, 2015

Product Photography: Tips for Vintage Sellers


As with any item listed online, pictures can either make or break a sale. The images you post need to evoke the feeling for the seller that the item is right in front of them, within reach. Something they feel they can reach out and touch, something that they can picture sitting in their own home, wearing on their wrist, or holding it in their hands. For vintage sellers, the task can sometimes be much harder. Every item we sell rouses a unique sense of the past, where the item originated, and the shape it is in today. When selling vintage, it is important to show the item in it's best light, but to also make sure the item is correctly portrayed - every nick, flaw or sign of age.

As a seller of vintage goods online on Etsy for over three years, I have struggled with these exact facts- what is the best way to show my item? How can I make prospective buyers see all the fabulous assets of my item, especially what I like to call, those items that are in vintage condition and show their age. I have come up with several tips on how to show your vintage item in the best way possible to online shoppers:

1. Background matters:
I struggled and struggled and struggled with backgrounds and never could make my photos look like they were "professional" so to speak. I envied the top selling shops and their amazing photography skills. Low and behold, with some constant admiring of my favorite shops and some online snooping, I found out how to utilize materials I had lying around my house to create my own little studio using a simple white poster board as a background. The key, I found, was the simpler the better. Avoid busy backgrounds that can draw away from your item- your item should be the main focus of the picture. While I personally prefer a white background, I am also drawn to wood backgrounds and simple textured backgrounds, like linen. Take a few shots to see what works best - try showing the item in front of a white poster board, lying on burlap, on your studio table, etc.


2. Show your item's flaws in the photograph:
Unless the vintage item is deadstock and still new in the package, it will surely have some flaws. Do not try to take a picture where the scratch is hard to see or the ding is on the other side. Many customers love the vintage items for their wear and tear appeal and seek out the rusty and dinged. I refer to these items in my own shop as having "vintage character" Make sure your photos include the good and the not so good-you never want to mislead a buyer. Show it up-close.

3. Close-Up:
Speaking of showing your items up-close, don't forget a close-up photo in your listings. A close-up allows your potential buyer to envision the item's texture.

4. Natural light is your friend:
When possible, I prefer shooting outdoors out of direct sunlight or indoors in an area with lot of natural light flowing in, but not flowing directly where you will be photographing.
Jigsaw Puzzle- Springbok Circular Puzzle - Garden Flowers - Vintage 1960s -  Maynard Reece - Floral Puzzle - Flowers - Gifts For Her
5. Take many, many, many photos:
When photographing, I sometimes take up to 20 photos of each item with many different angles. When I load them onto my computer, I narrow them down to the five that Etsy allows per listing. Seeing all the images one the one screen allows me to pick the five that best represent my item, getting many different angles.

6. Props props props!
Showing other items with the items being listed helps customers to envision the item displayed in their home next to their things. If the item is something that would look great on a bookshelf in the living room, add some books next to it. If you're selling a basket, fill it with something! Also gives the customer a better idea of the size of the items (because we are all guilty of thinking something will be much bigger or vice versa until we actually see it in person. *When using props, always remember to use a disclaimer stating exactly what the listing is for, "ie: books used in the listing images are for display purposes only and not included in the listing. If you don't add this disclaimer, customers may be wondering why their new item doesn't come with the lovely pine cone featured next to it.
*HINT: use items from your current inventory as props, too. This way you can say "Like the book collection I have featured in the photograph? View the listing here!"

If at first you don't succeed, try try again! Trial and error is the best way to see what personally works for your shop and your items, there is no "one-size fits all" way that your listings can be photographed. Enjoy the process!


Jessica Labowski of Start Talking Vintage: Jessica is a 23-year old recent college graduate who has developed a passion for all things vintage and the rich history they carry. She enjoys treasure hunting for historic beauties at estate sales, crafting, sewing and DIY projects (especially those that upcycle vintage items and give then new, modern appeal!) Stop by to take a look at her curated vintage treasures and handmade, vintage-inspired goods.


Friday, March 27, 2015

Nutmeg Collective Photo Challenge: April

Beacon Two-Twenty Five (flash attached on top) 
Spring has sprung! It's usually this time of year we maker-types are looking for a way to freshen up our studios and find new inspiration to boost our creativity. One way is to take time everyday to look for the inspiration around. To help you find some creativity inspiration, the Nutmeg Collective is starting a daily photo challenge. You don't need a fancy camera (though feel free to use one if you have it). You can use the camera on your phone to capture your photos based on the daily subjects noted below. Next, you post that photo on social media (Twitter or Instagram, or both!) using the hashtag #NutmegDailyPic. At the end of each month, we'll post a collection of some of our favorites and link back to your social media account.


Some of the daily themes are simple, others might have you thinking a bit! We'll be sprinkling in a few subjects that relate to the work place. We'd love to see your studio, office, creative nook...whatever area you use to find your creative mojo! Join us on this daily photo challenge, sharing your inspiration and hopefully getting inspired by others along the way.

If you have any questions, leave them in the comments and I'll do my best to answer them. If you're reading this and April has already begun, it's never too late to join the challenge. You can start on any day you like, and don't worry if you miss a day or two. Take on as much of the challenge as you can manage. This is supposed to be a fun and inspiring challenge, not a taxing one.

I'm looking forward to seeing all of your photos!


Patti Wunder of Easton Place Design Studio is the designer for this sweet studio. After her kids head to school, Patti creates logos, packaging, sell sheets, web elements and anything else her clients need for their businesses! Her sidekick, Aggie the Goldendoodle, is a great source of inspiration & reminds Patti to go outside a bit each day. Along with designing, Patti makes time for a pot of Irish Breakfast tea (one sugar & splash of cold milk), dark chocolate and music!